Showing posts with label Sql Server. Show all posts

Monday, 22 June 2015

Upload and Delete File(s) using jQuery Multifile library in ASP.Net MVC

In this article I am going to demonstrate about multiple file upload and delete in asp.net mvc application by using jquery.multifile and jquery.form library.

You can easily upload and delete the single or multiple files in a single hit of server and no need to call server function in each and every upload or delete of files.

Download Source Code

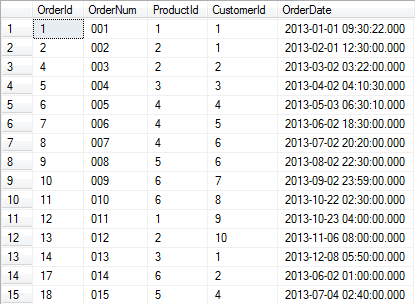
Here I am taking one scenario as an example. Suppose we have Product information in a table and we want to upload multiple files for a single product.


1)      In this case we need two tables one is related to Product and other is related to Product Files. Let’s first create these two tables in database (sql script is given in project source code).


2)      Open Microsoft Visual Studio

3)      Create a new asp.net mvc empty application and choose razor view engine to implement this example.

4)      Download the following packages and include in your application.

a)      jQuery

b)      Bootstrap (optional)

c)       jquery.multifile

d)      jquery.form

5)      Add ADO.Net Entity Data Model for selecting the database tables (Product and Product File) in Models folder. It will generate .edmx in your application. This is called Database First Approach in Entity Framework.

6)      Now create a _Layout.cshtml (master page) in Views/Shared folder and add reference of these files.

<html>

<head>

    <meta name="viewport" content="width=device-width" />

    <title>@ViewBag.Title</title>

    <link href="~/Content/bootstrap.min.css" rel="stylesheet" />

    <link href="~/Content/bootstrap-theme.min.css" rel="stylesheet" />

    <link href="~/Content/style.css" rel="stylesheet" />

    <script src="~/Scripts/jquery-2.1.4.min.js"></script>

    <script src="~/Scripts/jquery.MultiFile.js"></script>

    <script src="~/Scripts/jquery.form.js"></script>

    <script src="~/Scripts/app.js"></script>

</head>

<body>

    <div class="container">

        @RenderBody()

    </div>

</body>

</html>

7)      Now create a ProductController in controller folder in order to render following views:

a)      Index (To display the list of the products)

b)      Create (To create a new product)

c)       Edit (To edit and update the existing product info)

d)      Details (To view to details of existing product)

e)      Delete (To Delete the existing Product)


8)      Add an Index action and a View (view available in project source code):

 public ActionResult Index()

        {

            using (ProductEntities db = new ProductEntities())

            {

                return View(db.Product.ToList());

            }

        }

9)      Add a Create action (GET & POST) and its View (view available in project source code):

 public ActionResult Create()

        {

            return View();

        }


        [HttpPost]

        public ActionResult Create(Product model, HttpPostedFileBase[] files)

        {

            bool success = false;

            string message = "";


            if (ModelState.IsValid)

            {

                using (ProductEntities db = new ProductEntities())

                {

                    db.Product.Add(model);

                    db.SaveChanges();


                    if (files != null && files.Length > 0)

                    {

                        foreach (var file in files)

                        {

                            if (file != null)

                            {

                                SaveFile(file, String.Format("~/content/product/{0}/", model.ProductID));


                                ProductFile fileObj = new ProductFile

                                {

                                    ProductID = model.ProductID,

                                    FileName = file.FileName

                                };


                                db.ProductFile.Add(fileObj);

                            }

                        }

                        db.SaveChanges();

                    }


                    success = true;

                    message = "Product saved successfully.";

                }

            }

            else

            {

                message = "Model State is not valid.";

            }


            return Json(new { success = success, message = message, callbackurl = Url.Action("Index") });

        }

10)   Same way you can add Edit, Detail and Delete actions and its view.

11)   There is two common functions (Save & Delete) for upload and delete of file is also available in Product controller.

        #region Save and Delete File Function


        private string SaveFile(HttpPostedFileBase httpfile, string directory, string filename = null)

        {

            if (httpfile != null && httpfile.ContentLength > 0)

            {

                string fileName = filename ?? httpfile.FileName;


                if (!System.IO.Directory.Exists(Server.MapPath(directory)))

                {

                    System.IO.Directory.CreateDirectory(Server.MapPath(directory));

                }


                string filePath = System.IO.Path.Combine(String.Format("{0}{1}", Server.MapPath(directory), fileName));

                httpfile.SaveAs(filePath);

                return String.Format("{0}{1}", directory, fileName);

            }


            return "";

        }


        private void DeleteFile(string filepath)

        {

            if (System.IO.File.Exists(Server.MapPath(filepath)))

            {

                System.IO.File.Delete(Server.MapPath(filepath));

            }

        }


        #endregion


If you run an application, the output should be something like below screenshot:


You can add, edit, view and delete the product and its files as well.

Edit Product screenshot is given below:

Thanks for reading this article. The missing action and view is available in project source. If you have any question and doubt you can freely ask me and do not forget to give your valuable comments.

Download Source Code


Sunday, 27 April 2014

Union Example in SQL Server

In this article I am going to explain a use of union operator in SQL Server Database with a real life scenario and example.

The UNION operator is used to combine the result-set of two or more SELECT statements.

Notice that each SELECT statement with the UNOIN must have the same number of columns. The columns must also have similar data types. Also, the columns in each SELECT statement must be in the same order.

Before moving towards union query, let understand what is our scenario. Suppose we have three tables (Product, Customer and Order) in our database and we want to see the number of orders by month name, week days and between three hours gaps in day.

Let’s move towards our example:

1)      Product table structure and data. This table is not necessary to create for this example if you already have a ProductId in other table, to relate with Order table.

2)      Customer table structure and data. This table is also not necessary to create for this example if you already have a CustomerId in other table, to relate with Order table.

3)      Order table structure and data. This table is necessary specially OrderDate column of this table because we are going to use OrderDate column in all our further queries which shows us use of union operator in real scenario.

First union query which show the orders (number of orders received by month) result by month name:

Select [Month], [Orders] From (

      Select 'January' as [Month], 1 as [MonthNum], COUNT(*) as [Orders]  From [Order] Where MONTH(OrderDate) = 1

            Union

      Select 'Febuary' as [Month], 2 as [MonthNum], COUNT(*) as [Orders] From [Order] Where MONTH(OrderDate) = 2

            Union

      Select 'March' as [Month], 3 as [MonthNum], COUNT(*) as [Orders] From [Order] Where MONTH(OrderDate) = 3

            Union

      Select 'April' as [Month], 4 as [MonthNum], COUNT(*) as [Orders] From [Order] Where MONTH(OrderDate) = 4

            Union

      Select 'May' as [Month], 5 as [MonthNum], COUNT(*) as [Orders] From [Order] Where MONTH(OrderDate) = 5

            Union

      Select 'June' as [Month], 6 as [MonthNum], COUNT(*) as [Orders] From [Order] Where MONTH(OrderDate) = 6

            Union

      Select 'July' as [Month], 7 as [MonthNum], COUNT(*) as [Orders] From [Order] Where MONTH(OrderDate) = 7

            Union

      Select 'August' as [Month], 8 as [MonthNum], COUNT(*) as [Orders] From [Order] Where MONTH(OrderDate) = 8

            Union

      Select 'September' as [Month], 9 as [MonthNum], COUNT(*) as [Orders] From [Order] Where MONTH(OrderDate) = 9

            Union

      Select 'October' as [Month], 10 as [MonthNum], COUNT(*) as [Orders] From [Order] Where MONTH(OrderDate) = 10

            Union

      Select 'November' as [Month], 11 as [MonthNum], COUNT(*) as [Orders] From [Order] Where MONTH(OrderDate) = 11

            Union

      Select 'December' as [Month], 12 as [MonthNum], COUNT(*) as [Orders] From [Order] Where MONTH(OrderDate) = 12

) Results Order by MonthNum


Second union query which show the orders (number of orders received by week day) result by week day:

Select [DayofWeek], [Orders] From (

      Select 'Sunday' as [DayofWeek], 1 as [WeekNum], COUNT(*) as [Orders] From [Order] Where DATEPART(dw, OrderDate) = 1

            Union

      Select 'Monday' as [DayofWeek], 2 as [WeekNum], COUNT(*) as [Orders]  From [Order] Where DATEPART(dw, OrderDate) = 2

            Union

      Select 'Tuesday' as [DayofWeek], 3 as [WeekNum], COUNT(*) as [Orders] From [Order] Where DATEPART(dw, OrderDate) = 3

            Union

      Select 'Wednesday' as [DayofWeek], 4 as [WeekNum], COUNT(*) as [Orders] From [Order] Where DATEPART(dw, OrderDate) = 4

            Union

      Select 'Thursday' as [DayofWeek], 5 as [WeekNum], COUNT(*) as [Orders] From [Order] Where DATEPART(dw, OrderDate) = 5

            Union

      Select 'Friday' as [DayofWeek], 6 as [WeekNum], COUNT(*) as [Orders] From [Order] Where DATEPART(dw, OrderDate) = 6

            Union

      Select 'Saturday' as [DayofWeek], 7 as [WeekNum], COUNT(*) as [Orders] From [Order] Where DATEPART(dw, OrderDate) = 7

) Results Order by [WeekNum]


Third union query which show the orders (number of orders received by gap of 3 hours in a day) result by gap of 3 hours in a day:

Select [TimeofDay], [Orders] From (

      Select '12 AM to 03 AM' as [TimeofDay], 1 as [TimeNum], COUNT(*) as [Orders] From [Order] Where cast(OrderDate as time) between '00:00:00' and '03:00:00'

            Union

      Select '03 AM to 06 AM' as [TimeofDay], 2 as [TimeNum], COUNT(*) as [Orders] From [Order] Where cast(OrderDate as time) between '03:00:00' and '06:00:00'

            Union

      Select '06 AM to 09 AM' as [TimeofDay], 3 as [TimeNum], COUNT(*) as [Orders] From [Order] Where cast(OrderDate as time) between '06:00:00' and '09:00:00'

            Union

      Select '09 AM to 12 PM' as [TimeofDay], 4 as [TimeNum], COUNT(*) as [Orders] From [Order] Where cast(OrderDate as time) between '09:00:00' and '12:00:00'

            Union

      Select '12 PM to 03 PM' as [TimeofDay], 5 as [TimeNum], COUNT(*) as [Orders] From [Order] Where cast(OrderDate as time) between '12:00:00' and '15:00:00'

            Union

      Select '03 PM to 06 PM' as [TimeofDay], 6 as [TimeNum], COUNT(*) as [Orders] From [Order] Where cast(OrderDate as time) between '15:00:00' and '18:00:00'

            Union

      Select '06 PM to 09 PM' as [TimeofDay], 7 as [TimeNum], COUNT(*) as [Orders] From [Order] Where cast(OrderDate as time) between '18:00:00' and '21:00:00'

            Union

      Select '09 PM to 12 AM' as [TimeofDay], 8 as [TimeNum], COUNT(*) as [Orders] From [Order] Where cast(OrderDate as time) between '21:00:00' and '00:00:00'

) Results Order by [TimeNum]

Thanks for reading this article. Please suggest me how can I improve this one and other alternative way of doing the similar scenario.